Hokutan #2 part 1 – Introduction
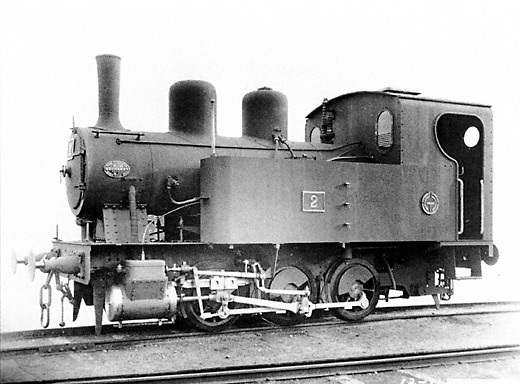
The Hokutan #2 is one of two 20 ton 0-6-0 steam locomotives built for the Hokkaido Colliery and Railway Company (北海道炭礦鉄道, Hokkaidō Tankō Tetsudō), a company engaged in coal mining, railway operations and shipping. The company was established in 1889 after purchasing the previously state owned Horonai coal mine and Horonai railway. The railway operations of the company were nationalised once again in 1906 under the Railway Nationalisation Act.
Neither of the locomotives has survived. However, a full size replica has been built, and is on display at the former Hokutan Railway Fukuchiyama Nishi Station.
I’m not sure what the locomotives were used for exactly, but considering the short length of the line they ran on, it is likely they were used to haul short trains. For Yamato Shinrin Tetsudō, the former Hokutan #2 will be used mostly on shunting duty around the freight exchange station.
The model
The model of this locomotive is a H0j kit by World Kougei. It consists of several sheets of brass, nickel silver and stainless steel, as well as some white metal detail pieces. I actually bought the kit about 5 or 6 years ago at the time of this writing. I purchased the kit from Loco1Hobby, a small shop in Japan run by a friend, which is unfortunately no longer in business. I only started building it after I had a better idea of which direction I wanted to go with the H0 project.
As is somewhat common with World Kougei kits, the building instructions are mostly several exploded views. They also often contain some minor errors, such as listing incorrect part numbers. It’s definitely a good idea to plan ahead and test fit everything with these kits. The kits are made in small numbers, so I can’t fault them for some errors sneaking in. And they’re service is top notch, so if something does go wrong, they will try to help you.
Unfortunately I didn’t take any pictures of the kit contents, or the first few steps of building the frame. I wasn’t really planning on doing a blog on this project at first. In the coming weeks I’ll post pictures and some thoughts on building the kit.
0 Comments